Monday, September 24, 2012

Algorithm Simulator Mini Version with Source Code

Once year back when I was in the 2nd year, I programmed the Algorithm Simulator to demonstrate the three sorting algorithms : Insertion Sort, Selection Sort and Bubble Sort. I released the source code also but due to lack of time, the code was not well documented or commented so that I received so many comments from those who went through the code that it was too difficult to understand. I'm glad that many found the project useful and therefore I'm releasing a mini version of the simulator with less number of code lines so that it can be understood easily. Here are some screen shots of the application. Find the download link at the end of the post.


Click Here to Download the Visual Studio Project (48.21 KB)

-Tharindu Edirisinghe
-SLIIT 10'


Wednesday, September 12, 2012

Blend for Visual Studio 2012 - Not working ???

Recently I installed Microsoft Visual Studio 2012 which comes with the .NET framework 4.5. Unlike the previous versions in VS, the new one comes with Blend inbuilt. After the installation, VS 2012 worked perfectly but when I tried to run Blend for Visual Studio 2012, it gave me the following error message. 

I followed the link displayed in the message to install the Blend + SketchFlow Preview for Visual Studio 2012. 
Then I downloaded the preview from the Microsoft Expression website which was 102.3MB. 
I followed the installation steps as shown in the images below.


Even after installing the preview, Blend for Visual Studio 2012 gave the same error message. Instead of that, the newly installed Blend + SketchFlow Preview for Visual Studio 2012 worked without any issue.

The new features of Blend are yet to be tried out. If anybody already gave it a try, feel free to give your comments.

-Tharindu Edirisinghe
-SLIIT 10'


Thursday, April 19, 2012

How to Create a Basic Crystal Report using Windows Forms and C#

From this post, I will show you how to create a basic Crystal Report. You don't need to have previous knowledge in reporting. Just a little bit knowledge in C# and SQL would be enough.

In SQL Server, I'm creating a database named 'Company' and inside that I have a table named 'Employee'. An employee has an id, a name and a designation. Sample values are added into the Employee table.

Then in Microsoft Visual Studio, I'm creating a Windows Forms Application.

Then I need to add a data source to the project. Right click on the project in Solution Explorer. Select Add and Click on New Item.
Then in the dialog box, select 'Data' as the Category and from Template, select DataSet. The name for the new data set is given as EmployeeDataSet.xsd in this example. Then click Add.

Then the EmployeeDataSet.xsd file will be opened. If not open it from the Solution Explorer. In the Toolbox, under DataSet, click on the TableAdapter, drag it to the working area and drop it.
Then the Table Adapter Configuration Wizard will be opened.
Click on New Connection. Then give the database details appropriately. In this example, server name is localhost and the database is Company. Then test the connection.
Once the connection is successful, click OK.
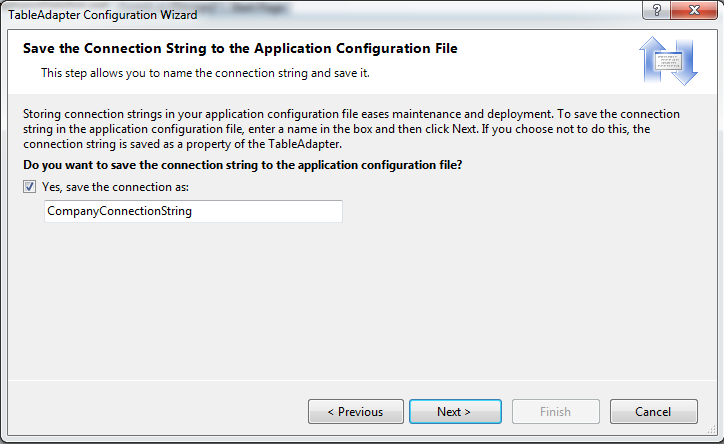
Now the connection string is created. Click next in the Table Adapter Configuration Wizard.
In the next window, you can give a name for the connection string. For my convenience, I'll leave the default name. Then click Next.

In the next window, select 'Use SQL Statements' and click Next.
In the next window, you can specify the SQL query for the table adapter. I'll use the Query Builder to build the query.
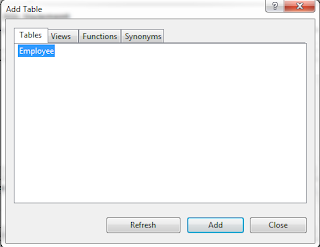
In the Add Table window, select the tables you want for the query and click on Add. Then close the window. In this example I'm adding the Employee table.
\
Then select the columns needed for the query and click Execute Query to view the result. Then click OK.

Now the query is successfully built. Click Next.

Make the selections as shown in the following image and click Next.
 Now the table adapter is successfully configured. Click Finish.

Now you can see the configured table adapter in the working area.

Now we need to add a Crystal Report to the project. Right click on the project in the Solution Explorer and  select Add -> New Item. From the categories, select Reporting and from the Templates, select Crystal Report. The name given for the report in this example is EmployeeReport.rpt . Then click Add.
 Here I'm creating a Standard Report using the Reporting Wizard.
In the wizard, select the data table that you want in the report. Here I'm selecting the Employee table. Then click Next.
Then select the fields to be displayed in the report and click Next.

Next thing is Grouping. Here I don't want to group the displaying fields. So I'll click Next without making any selection.
Next thing is filtering fields. Here I don't need any filtering so I'll click Next.
Next thing is selecting a style for the report. I'll select Standard style and click Finish.
Now the report is created. You can drag the fields and customize the appearance. Add lines and images if you need. I'll just leave it as it is.
Now the designing is over. Now we need to view the report. Get the Windows Form (here Form1). In Tool box, under Reporting menu, click on the Crystal Report Viewer and drag it to the form and drop. 


Now we need to write little bit coding to display data on the report viewer. Go to the Form Load event and write the following code.

Now run the project and see the output report.


Feel free to put your comments here !

-Tharindu Edirisinghe
-SLIIT 10'

Friday, April 6, 2012

MySQL Basics for beginners

I thought of writing this post as a reply for a comment published in the last post I wrote on connectivity of Java and MySQL. From a previous post I showed you how to install and configure MySQL server on your PC. From this post you can learn some of the basic but essential operations you can do using MySQL. 

First open the command prompt. These are the very first commands you should give.

For normal login to MySQL server, type mysql and press Enter.

If you have a user name but no password, type the following and press Enter. Here my user name is 'root'.

mysql -u root

If you have a username and also a password, type the following and press Enter. Here my user name is 'root'.

mysql -u root -p

Then it will prompt to enter the password. Type the password and press Enter.

Now you have successfully logged into the MySQL server. In your command prompt, the following will appear.
mysql >

Now let's see how to view all the databases currently in the server. The command is,
show databases;

The command to create a new database is the following. Assume my database name is sliit.
create database sliit;

In order to manipulate data inside a database, first we need to go inside the particular database. The command is the following. Assume  my database name is sliit.
use sliit;

Now you are inside the database. You can view the tables inside the database using this command.
show tables;

You can create tables using MySQL statements that you already know. Given below is an example.
CREATE TABLE Students
(
      id INT PRIMARY KEY,
      name VARCHAR(20)
);

To view data in a table, you can easily type a query like this.
SELECT * FROM Students;

I hope now you are familiar with the basics. If you don't like to work in command line, there is a tool called 'MySQL GUI Tools'. It provides a easy to use graphical user interface to handle MySQL operations. 

If you have any questions, feel free to put as comments. 

-Tharindu Edirisinghe-
-SLIIT 10'-


Tuesday, April 3, 2012

Java, MySQL and iReports (ST II Assignment)

For our ST II subject at SLIIT in the 1st semester of the 2nd year, we had to develop an application using Java, MySQL and iReports. I used NetBeans as the IDE for the development. Using the application, the user can insert, update and delete and view records in the database. The application is for adding employees, adding projects and assigning employees to the projects. The application also generates two iReports to view details of projects.

This is the initial form of the application. 

Some other forms are shown below. 


The database schema is attached in the project. First create the database with tables in MySQL server. You will have to change the database connection parameters in the project according to your server details. 


-Tharindu Edirisinghe-
-SLIIT 10'-

Tuesday, January 10, 2012

C# and MS SQL Database Connection Software

Using the software I have developed, it is easy to handle all the SQL server database information. When you run the software, it shows all the databases in the server. You can click on the particular database you want to manage.


 Then it shows the tables inside that database. You can click on the table name that you want to manage.


Then it shows all the data in that table. You can insert, update and delete records of that table. Once the modification is complete, press the appropriate button in the left side panel.

It is also possible to write your own SQL statements. It comes with a syntax highlighter. Currently the syntax is limited but you can add the commands in the project source code as you wish.


Click Here to download the Visual Studio 2008 project source code. (63.32 KB)

P.S - If the database connection fails, you will have to modify the App.config file in the project giving the correct server name, user name and password. Then rebuild the project.

-Tharindu Edirisinghe
-SLIIT 10'